

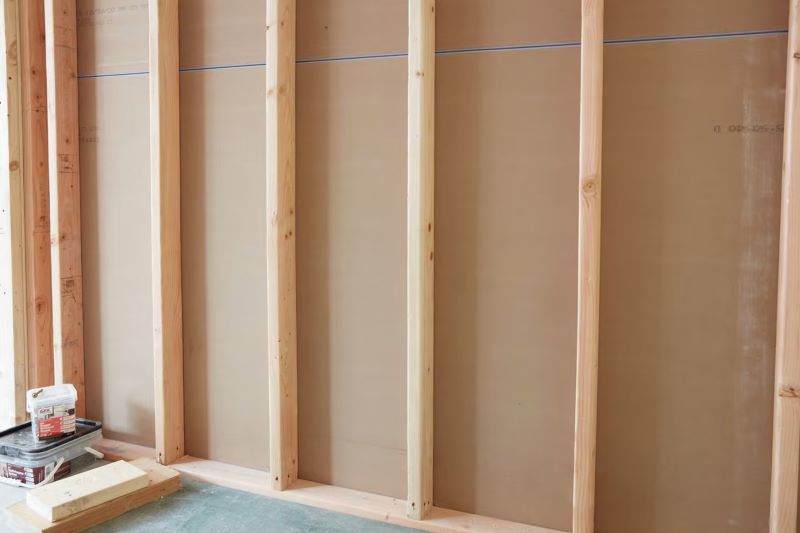
Studs are vertical, wooden beams within the wall that provide the necessary support for heavy objects. It’s vital to attach your floating shelf brackets to at least one stud so that the floating shelves don’t fall out of your wall! There are several methods for finding studs in your wall, so read through and find the one that works best for you!

Use a Stud Finder
This is by far the most common way to find studs. A stud finder is a handheld electronic device that is designed to detect changes in density behind the wall.
To use a stud finder, turn on the device and place it against the wall where you want to find a stud. Move the device slowly along the surface of the wall until the stud finder detects a change in density. This change in density indicates the presence of a stud.
Some stud finders have additional features, such as the ability to detect live wires behind the wall or to mark the location of studs with a laser. These features can be useful for making sure that you don't accidentally drill into a live wire or for accurately placing your mounting hardware.
This best-selling whole stud finder from Home Depot is a great option because it can indicate the entire width of the stud and not just the center or edge. The Zircon stud finder is also a favorite of ours.
Using a stud finder is a great option if you’re new to DIY projects or aren’t comfortable using other methods.
Look for Outlets and Switches
If you don’t have a stud finder, don’t sweat. You can check for electrical outlets and switches to determine the location of the studs. These fixtures are usually mounted to the side of a stud, as the stud provides a stable surface for the outlet or switch to be anchored to.
To use this method, start by examining the wall and finding the locations of any electrical outlets or switches. Once you have found one, you can measure the distance between it and the adjacent corner or edge of the wall. This will give you a rough idea of the spacing between studs.
Using a tape measure or ruler, measure the distance between the electrical fixture and the corner or edge of the wall in both directions. For example, if you found an outlet 6 inches from the corner of the wall on the left side, measure 6 inches from the corner of the wall on the right side to find the location of the adjacent stud.
Repeat this process along the wall, measuring the distance between each electrical fixture and the adjacent corner or edge of the wall to locate additional studs. Keep in mind that the spacing between studs may vary, so it's important to check multiple locations along the wall to get an accurate idea of their placement.
It's important to note that this method may not be as accurate as using a stud finder, as the spacing between electrical fixtures can vary and there may be other factors that affect their placement on the wall.
Additionally, if the electrical fixtures have been installed using anchors or other hardware, they may not necessarily be attached to a stud. However, this is still a useful method for finding studs in a pinch, particularly if you don't have access to a stud finder or other tools.
Knock on the Wall
Perhaps the most old-fashioned way to find studs, a favorite among seasoned builders and designers, is by knocking on the surface of the wall. There’s nothing wrong with Grandpa’s method!
This method relies on the fact that wooden studs have a denser, more solid sound when you tap on them compared to the hollow sound you get when you tap on the spaces between the studs.
To use this method, start by finding an area of the wall where you think there might be a stud. Then, make a fist and gently tap your knuckles against the surface of the wall. Listen carefully to the sound that the wall makes.
If you hear a solid, dense sound when you tap on the wall, you’ve probably found a stud. If you hear a hollow, empty sound, this indicates that you are tapping on the space between the studs.
When using this method, it's important to tap lightly and listen carefully to the sound that the wall makes. It’s helpful to tap along a line where you suspect a stud might be located, such as along the edge of a doorframe or window.
Just keep in mind that this method may not be as accurate as using a stud finder or other tools. Some walls may be constructed in a way that makes it difficult to tell the difference between the sound of the studs and the sound of the spaces between them.
Additionally, if the wall is covered in a thick layer of insulation or other materials, this can make it more difficult to hear the sound of the studs.
But, when in a pinch, knocking can be an effective way to locate studs when no other tools are available!
While there are a variety of methods that you can use to locate studs, each method has its own advantages and limitations. If you have access to a stud finder, this is typically the most reliable and efficient way to find studs in your wall. But no matter which method you choose, it's important to take your time and be patient!
Finding studs in your wall can be a bit time-consuming, especially if you are working with a large or complex wall. However, taking the time to locate the studs correctly can help you avoid damaging your wall or your mounting hardware, and can help ensure that your custom floating shelves are secure and look their best!